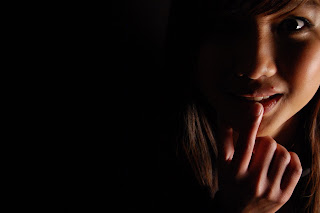
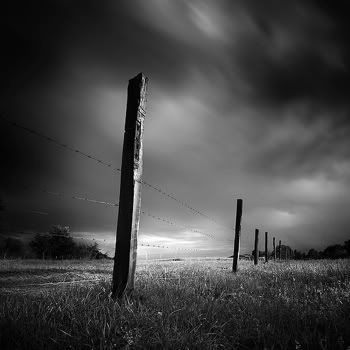
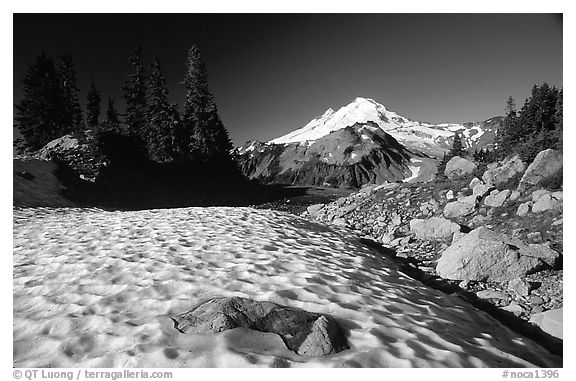
- 3 amazing abstract images (at least one must be a slow shutter image)
- 1 contact sheet
Monday, December 14, 2009
ABSTRACTS, to turn in...
Winter Assignment...


Some tips for shooting this time of year:
The angle of the sun on the horizon is smaller during wintertime, creating numerous pleasing effects for photographers, such as a prolonged period of the magic hour.
We refer to the magic hour as the time around sunrise or sunset, when most of the light is reflected and the direct light of the sun passes through a lot more atmosphere, thus filtering out the harsh neutral or blue cast.
Throughout the entire day, the sun will never reach a high zenith, always illuminating our subjects at a much more pleasing angle. Summer sun often causes extreme shadows and contrast and the lighting shifts more towards blue tones.
Due to the low angle of the sun, textures will look three-dimensional and become alive and shadows will be long and deep. We can use shadows to support our main subject, to hint at the presence of a subject by only showing its shadow or to create a sense of scale by comparing shadows. Shadows are copies of our subjects with different qualities that can greatly enhance our composition.
Weather
Most of the summer all you get is a flat blue sky. Come winter, things change. Suddenly the sky gets interesting. Finally, the setting sun has the reflector it needs to create sunsets we only see get during the winter months. The clouds reflect the sunlight and because it now travels thousands of miles through the atmosphere, its deep red light will illuminate the clouds and the landscape creating unique “scapes” that only photographers know exist and many attribute to the wonders of digital image manipulation.
Winter has many other beneficial weather patterns to offer. Nothing is as exciting as photographing a virgin snowscape in the first light of the day. When a white veil of beauty covers all the unsightly spots and the frost glistens from the trees reflecting the first rays, you know that only winter can provide such beauty.
Tips and Challenges
Here are some technical tips for those of you who need no further convincing that winter time is the prime photography season.
Cameras tend to underexpose white and overexpose black as they gravitate toward neutral grey. You need to overexpose snowscapes by up to 2 stops. If you are shooting sunrises, you will not have much time to figure things out as the light changes quickly, so it is good to know this.
Wednesday, December 9, 2009
Monday, December 7, 2009
Reaserch Quiz
Monday, November 23, 2009
For Portraits...
Thursday, November 19, 2009
Abstracts!!!


Definition: Abstract Art is defined as: any art in which real objects in nature are represented in a way that wholly or partially neglects their true appearance and expresses it in a form of sometimes unrecognizable patterns of lines, colors and shapes.

your task is to look at the ordinary and make it extraordinary by manipulating what you see. Get close to your subject and focus in on a small part, look for a very unique angle, shoot with a very slow shutter speed to blur motion... you will be shooting an entire roll of abstract images. Think out of the box, get creative, and have fun with this!
To shoot:
24 abstracts
6+ need to be with shutter speeds slower than 1/8 of a second to blur actions (move the camera or shoot a moving object to make in into an abstract)>

Wednesday, November 18, 2009
PORTRAITS! film due today!
Choos a photographer from the list here
In no LESS than one page (double spaced 12pt font) please explain:
• Who you selected and who they are (i.e. when, where, what etc)
• Describe their photography (what is unique about her/his style and technique), what do the photograph, how, why?
• Explain how he/she (or something they did, used, invented or created) has impacted or changed the world of photography.
• Why did you choose this photographer? What do you like about their work/style?
Friday, November 13, 2009
more portraits...
Monday, November 9, 2009
portrait digital shooting
example: if you selected shooting from alternate perspectives as one technique, shoot 3 images of a subject, each from a different alternate and unique perspective (i.e. above your subject, looking up at your subject, and possibly up very close to your subject...
We will have about an hour to work on this, including time to import and create a contact sheet in PhotoShop, one for each member of your group with their 9 pics...
Friday, November 6, 2009
PORTRAITS!!!


Portrait Assignment
first half of roll >12 photos :
1. Find ONE interesting human subject. The person you choose should WANT to be in the picture and they should be willing to cooperate.
2. Talk to your subject. You are the director of this adventure, make it what you want. Use shadows or lighting to create a concept for your portrait. Costumes or uniforms work great. Imaginary ideas are OK. Choose an interesting setting based on your concept.
3. Change angles between shots. Shoot at least 12+ pictures of your subject.
5. Change your lighting; Use filters, flashlights, lamps, or multiple lights to enhance your picture.
6. Remember you are the boss, make them change their expression. Pretend it is high fashion and they have to create the next great "look" like blue steel (Zoolander).
7. Most importantly for this assignment don't forget your composition rules. Use framing, leading lines, rule of thirds, color contrast etc. to enhance your photo. Fill the frame!!!! HAVE FUN & BE CREATIVE!!!!
second half of the roll -- random portraits... these do not have to be of the same subject, these can be of friends, pets, parents, strangers, etc.
Wednesday, November 4, 2009
Beauty Is... TIMELINE
Please turn in:
- your BEST "beauty is" image
- a contact sheet with your ~24 "beauty is" images
****If you want the 15 points Extra Credit for entering the contest, you will need to have a parent sign the entry form, if you are under 18 years old.****
download the form here (I also have copies in class)
Thursday, October 29, 2009
FRIDAY
For Friday...
Search on:
- http://www.gettyimages.com
- http://www.istockphoto.com
- Google images
- http://www.fotosearch.com
Wednesday, October 28, 2009
FINISH SHOOTING "BEAUTY IS..."


You should be complete with your roll of film for the "beauty is..." assignment BEFORE Friday October 30. We will process this film on Friday, be sure to have it with you. We will also have an in class assignment.
Tips for shooting beauty is:
- be creative with your concept/interpretation
- think outside of the box
- be sure your image is interesting
- follow our compositional rules (1/3, leading lines, balance, framing etc.)
- always, ALWAYS, shoot from a unique or interesting angle/perspective
- consider lighting/shadows
Monday, October 26, 2009
Video today...
- aperture
- shutter
- depth of field
- light meter (what color does it look for)
- lens types (tele, macro, etc)
- film types (ignore color info)
- darkoom chemicals
- loading film
- test strips
Friday, October 23, 2009
Beauty Is... TIMELINE
Monday Oct 26: Darkroom technique/skills
Wednesday Oct 28: Work Day
Friday Oct 30: Last day to shoot
Monday Nov 2: Printing
Wed Nov 4: Printing
Fri Nov 6: Print & Contact sheet due, matted, with entry form and blurb.
Dodge and Burn...
| This article does not cite any references or sources. Please help improve this article by adding citations to reliable sources. Unsourced material may be challenged and removed. (July 2009) |
Dodging and burning are terms used in photography for a technique used during the printing process to manipulate the exposure of a selected area(s) on a photographic print, deviating from the rest of the image's exposure. Dodging decreases the exposure for areas of the print that the photographer wishes to be lighter, while burning increases the exposure to areas of the print that should be darker.
Any material with varying degrees of opacity may be used, as preferred, to cover and/or obscure the desired area for burning or dodging. One may use a transparency with text, designs, patterns, a stencil, or a completely opaque material shaped according to the desired area of burning/dodging.
Ansel Adams elevated dodging and burning to an art form. Many of his famous prints were manipulated in the darkroom with these two techniques. Adams wrote a comprehensive book on this very topic called The Print.
ADVANCED DODGING AND BURNING:
http://www.photovisionmagazine.com/articles/fstopprinting.html
Wednesday, October 21, 2009
Re-Grade Policy...
- if an assignment is turned in on time it may be resubmitted as many times as a student desires to achieve the grade desired. Re-submitted work should be turned into the re-grade box and should be labeled as to what assignment they are to replace.
- There is no cap on the grade resubmitted work can achieve, there is also no cap on the amount of times an assignment can be resubmitted.
.

example resubmitted image

Landscape Turn In:
To turn in:
- Contact sheet with your 24+ landscapes
- 3 printed landscapes (all with for/mid/background, rule of 1/3, variable contrast, proper exposure, etc.)
Monday, October 19, 2009
Reflections assignment
The 2009-2010 Reflections theme is “Beauty Is...” which can be interpreted in your own unique way. Decide what the phrase means to you and how you can explain, depict or portray in a photographic form what the concept of beauty is. Interpretation of the theme, artistic merit and creativity are the criteria by which each entry is judged. If you are chosen as a finalist for Shorecrest, your artistic work will go on to the Shoreline Council level, then possibly to State and National levels. This is a great way to be recognized for your artistic talents and ability to express a theme in a creative way.
What do you think “Beauty Is...”? Think out of the box, get creative, remember the compositional techniques we have studied and remember for every image you take, try to make it unique, creative, and something you are proud of...
Click here for more information.
Click here for entry form.
Monday, October 12, 2009
Landscapes... printing!
tips:
- use contrast filters
- focus & adjust your horizon line to be straight
- be sure your easel crops the edges of your image
- look for for/mid/background
- follow rule of 1/3 and horizon line
- make test strips for EVERY print
TURN IN from 1st shooting assignment...
- contact sheet and test strip
- image and test strip
- re-printed image using filter and test strip(s)
Monday, October 5, 2009
filters...
Using filters...
Contrast filters are necessary for increasing or decreasing the amount of contrast in your print. If your test prints are coming out much too gray, then increasing the number of your filter will increase the contrast, making the whites whiter and the blacks blacker. Everyone has a different preference when it comes to deciding which contrast filter to start with, but I have always found for my purposes that a contrast filter of 3 suits me well when I’m working on a black and white enlarger.
Changing your contrast filter as you do test prints will also affect your exposure times, so don’t expect the same results in exposure when changing from a 3 to a 3 1/2 or a 4. You will need to make a new test strip!!!

The first photograph here shows the effect of a lower contrast filter. The second illustrates the effect of using a contrast filter higher in number.

Friday, October 2, 2009
Wednesday, September 30, 2009
Landscape Task...
Landscapes!!!!

Landscape comprises the visible features of an area of land, including physical elements such as landforms, living elements of flora and fauna, abstract elements like lighting and weather conditions, and human elements like human activity and the built environment.
Please do not center the horizon line and try to show something in the foreground, mid-ground, and background.
The trick to landscapes is to show depth:


the secret to getting your images to show depth is to include for/middle/background all in the same image. Let it lead the viewer from something up close to things far away... similar to the leading lines we just shot.
epic examples:
http://www.outdoor-photos.com/


