Wednesday, May 30, 2012

Portfolio/Final Planning

Please answer the questions in the post below:

http://learn.shorelineschools.org/shorecrest/bstory/index.php?section=discussion&threadID=33562

Items of note for your final:

Final Requirements -

  • once central theme/idea/concept/technique
  • minimum of 24 pics for your topic
  • 4+ prints (8"x10")
  • 1 additional print using a darkroom experimentation (not related to your theme)
  • All items need to be cobbled together into a presentable portfolio
  • written component to come later.
Timeline:

You will have the remainder of the term to work on this.  We will make a darkroom schedule as crunch time hits and the darkroom gets more crowded.  It is often a good idea to plan a couple lunch/TAP darkroom sessions to ensure you have time to make the prints you need.

Grading:

Each of your 5 images will be graded as a stand alone assignment.  All should be reflective of your best work.  This assignment is worth over 300 points!

Tuesday, May 29, 2012

Darkroom experimentations

You have a BUNCH of options for your next project.  Pick one:


Double Exposure:

sandwich Negatives - 


Firstly, in case you are not familiar with a sandwich print, it is an image made from printing two negatives at the same time.

The end result will look something like the included picture which you may have seen around Venice Arts at some point.

To get started you will need two pictures that you think will work well together. Personally, I like to combine interesting backgrounds with simple portraits.

After you've chosen your two images, you load both of them into the negative carrier like you normally would, except they are stacked on top of each other. Once they are in and taped securely so they won't move around you will probably have to adjust and open up the aperture to be able to see both images. After focusing as usual, you will make test strips to find the best time for the picture. *You will most likely have to use longer increments of time than you normally would, I usually start with 4 seconds but I have had to go up to 6 seconds on occasion.

Next create a test print to see how the entire image looks, how the pictures look together, if you need to adjust the position of any of the negatives, or if some parts are too dark. Next you dodge and burn accordingly.


Creative Dodging and Burning:


For this technique you are exposing a portion of one negative along with a portion of another.  You will need to make test strips for both.  Once you know your exposure, you will dodge one area while exposing another.  Then swap out the negative and expose the other portion and dodge the previously exposed part.  Some overlap is helpful.

Solarization - or the Sabbatier effect:


Normal print


00


Solarization (aka the Sabbatier process) is very experimental, and there are many ways to do it.

In essence, the process involves flashing a partially developed print with white light, and then allowing development to complete. The result is a print in which some of the tones are reversed (highlights become shadows, shadows take on a silvery glow), and you may also get white "Mackie lines" separating highlights and shadows. Often, the result is dark and muddy; the objective is to produce a print that displays the typical characteristics of a solarized print but that is not so dark. The process tends to work best with graded papers, and especially with papers of higher contrast grades.

Take the print out of the developer, and then turn on the white light briefly. How briefly is part of the experimental nature of the process, and will vary from one print to the next.

In some instances it is necessary to put the print back into the developer. In other cases, you can simply let the print sit for a moment while the developer in the emulsion does its thing, and then transfer the print to the stop. Again, its an experimental process.


HOLGA!


You can shoot a roll of 120 film through a plastic Holga camera.  The results are unique, fun, and random!
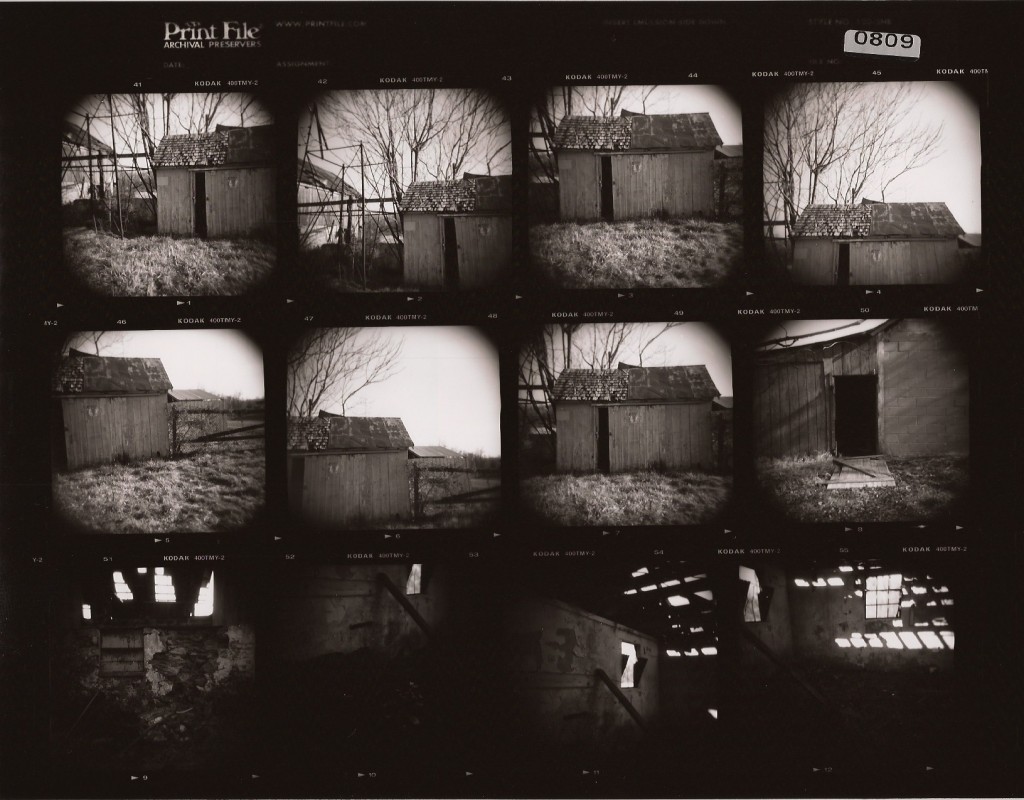


Paper Negative:


  • From a digital image name a negative in PhotoShop
  • print on a printer
  • Lay a piece of unexposed paper down with the emulsion side facing up
  • Place the paper negative, face down, onto the unexposed paper
  • Place a have piece of plexiglass on top of the papers
  • Press/squeeze to ensure a good contact with no air bubbles
  • Expose via your enlarger lamp for a few of seconds (again, you will need to make a test strip - every negative is different)
  • Process and dry the new image as you would any print
http://www.sephi.com/wp-content/uploads/2009/11/paper-negative-1.jpg

Wednesday, May 23, 2012

Time to start planning for your FINAL!

You only have 2 assignments left.  One is an experiment in darkroom techniques or film processes.  The other is your final.  Today you should start considering your final. 


Final Details:
  • A topic of your choice (can be a camera technique or a compositional topic)
  • one roll of film (contact sheet)
  • 4 images
  • a reflection paper
  • a couple sentences describing your images, relation to your topic, darkroom adventures etc.
Examples:
  •  Music in Seattle
  • Abstract
  • Slow shutter speeds
  • high contrast portraits
  • snails eye view

Wednesday, May 16, 2012

Too Many Bad Grades!

Almost half of you have a "D" or a "F" in this class.  This is not OK.  You are allowed to make  up or redo any assignments for a better grade.  Please take advantage of this.  Mr. Treadway is going to talk with each of you regarding your current grade and missing work.

Thursday, May 10, 2012

Digital Portrait Contact Sheet Due Today

Use Adobe Bridge, its in your applications folder.


We then need to open the output window:


With the output window open you can select rows and columns and then find your pics.  You will need to select the 18 pics you want to use (easiest if they are in a new folder). Then choose save PDF and it will save a contact sheet to your desktop (or wherever you choose).  This is what you will turn in today!

Tuesday, May 8, 2012

Sitting around?

There has been far too much off task time.  Especially when the average grade in here is a C-.  If you are not printing in the darkroom, processing film, or shooting digital portraits in S1 you now have an additional task (only required of those off task).

You must write a research paper based on an article found in Outdoor Photography magazine.  You must answer the following question:
  • topic of article
  • a summary of article
  • how could you use this technique to better the images you have taken in this class
  • what more would you like to know about this topic.
500+ words.

Portrait Specifics

Film Portion:
  • 1 or 2 subjects
  • whole roll of film
  • wide variety of locations, angles, poses, expressions, concepts, images
  • you will turn in a contact sheet and 2 printed images
Digital Portion:
  • 6+ images from each of the 3 stations
  • wide variety of photos, angles, poses, expressions, concepts, use of lenses provided
  • you will turn in a contact sheet of 18 images (made in Bridge).

Wednesday, May 2, 2012

Thursday


Due today:
  • Masters of Photo Print
  • Masters of Photo Contact Sheet
  • A digital image printed from your Master
Other assignments for today:
  • Digital portraits in S1 
  • Each student will need 6+ images from each station by one week from today.

Tuesday, May 1, 2012

Lighting Techniques

What Is Short Light?

Short light is type of studio lighting setup, where the face side which is further from the camera gets the main light. see the diagram for details. In this type of lighting setup, the side of the face which is toward the camera gets less light then the side facing away form the camera. The effect you get when using this lighting setup is a thin face, this is why it is good to photograph fat (or chubby) people with a short light setup. short light setup

Diagram 1 - Short Light


Let's look at a picture of a friend of mine - Winnie the poo. Looks like Winnie had allot of honey and he is quite chubby. The flash is set up to my right, and Winnie is looking to his left. This make his face look a bit thinner than what they really are. Short light is very useful in portrait photography, as it gives drama to the subject. (Short light setup also stresses skin wrinkles, to create even more drama for older people)
short light
What Is Broad Light?

Broad light is just the opposite of Short light. In the Broad Light setup, THe side that is getting the most light is the side turning towards the camera. This setup is less commonly used for portraits as it tends to make people look chubby. See the diagram for setup.
broad light setup

Diagram 2 - Broad Light


Lets look at Winnie again. This picture was taken at the same focal length (135mm with 1.5 crop factor D70's sensor). This time Winnie looks very chubby. Oh Winnie! what have you been eating? Also note how the picture looks a bit flatter. There are not allot of light and shade plays.
broad light
For both types of light you can use a fill light at the opposite side to the main light, or do as I did and use a reflector at 45 deg. (see diagrams).
Conclusion:
Light Type
Side to Get Most Light
Chubbiness
Wrinkles
Short Light
Away From Camera
Reduce
Intensify
Broad Light
Facing Camera
Increase
Reduce


Short Lighting

Short lighting illuminates the part of the face that is not facing directly at the camera. In Figure Z, we can see that the side of the face facing the camera is in the shadow side. Short lighting often is the preferred light positioning for most portraits especially for rounder faces or faces less defined facial features.
20090803-IMG_9103
Putting the shadow side of the face closer to the camera narrows down the face and works well for majority of subjects except those with long or thin faces.

Broad Lighting

Broad lighting is the opposite of short lighting where the lit portion of the face faces the front of the camera. Showing the lit portion of the face directly at the camera broadens the face as it illuminates majority of the subject’s face instead of hiding it in the shadows.
20090803-IMG_9108
While not as popular as short lighting, broad lighting can be used effectively with thinner faces and can make subjects such as the elderly look more radiant and lively. Broad lighting is a “cheerful” light position that portrays openness and excitement.


Read more: http://www.howitookit.com/classic-lighting-styles.html#ixzz14njY6ZBR

https://blogger.googleusercontent.com/img/b/R29vZ2xl/AVvXsEhbMtvXuWyg8g05OIxiY7UQ4FSAT3rXvnyEXuW4Aapo4erAd05tmACPg4FdUrCKGym8DPQPN0uvl_CPs0Ct4oZ-mv27-i-1DoiCzBRhuxQtRtOCnmJv3sp-bPet_o6OBjeY4BalCQI5SefC/s1600/Picture+4.png

Digital Portraits


Studio Lighting!!!
Your task this week is to shoot some interesting , creative and unique portraits using the studio lights. Remember the different lighting techniques demonstrated in class. Use the lights to add emotion, feeling, or interesting shadows to your images. Try to think out of the box, manipulate the image
with Manual settings on the camera, blur motion, stop action, take tons of pics, and have FUN! Shoot for the period in groups of 4 to 6 per light station. Everyone should shoot their own photo session. Take turns as each others subjects. Shoot a minimum of 6 pictures per photographer per station.


Masters of Photo THURSDAY

On, or before, Thursday please turn in the following:

  • a printed digital image taken by your photographer
  • a darkroom print made by you
  • a contact sheet of your MOP roll of film

Unacceptable

Your level of cleanliness in not acceptable.  You need to pick up after yourselves.  No negatives, test strips, film rolls, or other associated garbage should be left in the darkroom or otherwise.  There are 6 trash cans and 2 recycle bins in the room.  Use them.