Today is your day to go from film to negatives:
here is a how to:
Wednesday, February 29, 2012
Tuesday, February 28, 2012
Thursday
Composition Reading:
http://www.photographymad.com/pages/view/10-top-photography-composition-rules
http://www.photographymad.com/pages/view/10-top-photography-composition-rules
Supplies
Today you will receive your supplies for this course (at least the first installment). Your materials fee pays for these supplies. Your fee is due! This will impact your grade until it is paid.
$30 to Ms. Denney
You will receive:
$30 to Ms. Denney
You will receive:
- a shared packet of paper (don't loose it)
- 5 rolls of film
- 5x7 paper when we start making prints
Today you will be shooting your first roll of film. This will be 23-25 exposures. Here are the criteria on which you will be graded:

NOTE: be sure your film rewind knob is turning with EACH time you advance your film, this indicates it is loaded correctly:
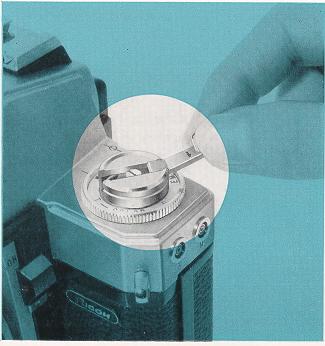
Also, remember NOTHING takes force with these cameras. If your camera will no longer advance you are probably done with your roll of film or it is jammed, do not try and force ANYTHING. The cameras are old, fragile, and did I mention OLD!
- Film loaded correctly
- ~24 pictures taken
- >15 images properly exposed
- Film processed correctly (Thursday)
- Contact Sheet printed (next week in darkroom)
NOTE: be sure your film rewind knob is turning with EACH time you advance your film, this indicates it is loaded correctly:
Also, remember NOTHING takes force with these cameras. If your camera will no longer advance you are probably done with your roll of film or it is jammed, do not try and force ANYTHING. The cameras are old, fragile, and did I mention OLD!
Monday, February 27, 2012
developing film
 | Next you need the developer tank. The more common one is the AP. It's made entirely of plastic and is one of the easiest to load in the film. |
 | You will need the measuring cylinger & a thermometer. |
 | A stop watch is a must. |
 | Invest in a changing back. Do not think that your store room is dark enough. |
 | Step 2 - Load Film Now you have the tools, it's time to start work! When rewinding an exposed roll of film, leave the end behind so that you can pull out the film from the canister easily. This step is supposed to be done in total darkness or in a dark bag. Do not expose undeveloped film to any form of light. Your entire roll of film will be void. Remember: DO NOT ATTEMPT THIS STEP IN BROAD DAYLIGHT ! |
 | Now
you can load the film into the developer tank. You will need to do
this in the dark bag! Do not pull out the film and expose to light. All
the shots that you have taken will be exposed & void! If the entire roll is reeled back into the film canister, you will need to open up the film canister using a bottle opener or use a film picker to retrieve the end of the negatives. |
 | This is the most crucial part of the developing process. Reel in the film into the white reel. You will need to practise this procedure in the light first. Practise with a void exposed negatives and make sure you are confident in doing it in the dark. Practise reeling in with your eyes blindfold or in total darkness. I personally find that it's easier to pull out the entire roll of negatives in the dark bag first and reel the end portion into the reel. |
 | The negatives are rolled in with the help of two small ball bearing roller on the reel. Ensure the reel is DRY before reeling in the negatives. Wet reels cause the ball bearing to loose friction and unable to reel the negatives proper;y. You may damage or bent your negatives if the reel gets stuck. |
 | Apply consistent pressure and make sure the negatives do not get stuck and bent. |
 | In "rocking motion" reel in the entire roll. |
 | Practice make Perfect. |
 | Viola! |
 | Now you can load the reel into the developer tank. |
 | Once the reel is in the developer tank, screw in the top cover. The rest of the procedure can be perform in the light. The tank is designed to be light tight. So, do not be afraid the film might get exposed from this point forward. |
 | Step 3 - The Developing Preparing the developer solution. Follow the dilution instuction on the film. If you could not find the dilution instruction, check out this web site: http://www.digitaltruth.com/devchart.html for development timing with respective solution. |
 | Pour the solution into the developing tank. Shake the tank for 10sec for every minute of soaking. |
 | Shake well in a rocking motion for 10sec. |
 | Dislodge the bubbles after shaking by hitting the bottom of the developing tank lightly on a piece of cloth. Reason for doing so is to dislodge, clear the bubbles from the reel that was built up during shaking. Failure to do so might end up with white spots on the negatives. You do not need to follow the time up to the last second. Give and take 15~20sec should not get noticable difference on your negatives. To "push" the film, simply develop slightly longer (about 1 to 2 min) to get the film exposed to the developer longer. |
 | You can store the developer working solution for future use. Remember, this is done at your own risk! If you want to save on the developer, the working developer solution can be used up to 3 to 4 times in a month with no noticable degradation. However, extend the developing time by 30s for each cycle as the solution might get more diluted after a few wash. I would suggest to dispose the working solution after 3 to 4 use or after 1 month. |
 | After pouring out the developer working solution, you will need to wash away any developer residue on the negatives surface. You can either use the stop bath or flush the developer tank with plenty of water. In this part of the world (Singapore) water is precious. So usually, I will recycle the water to flush my toilet. Rinse up to 4 to 5 times to ensure the developer is thoroughly washed off. If possible, shake the tank to make sure the negatives are thoroughly rinsed.. |
 | Step 4 - The Fixer Next, prepare the fixer. Follow the instuctions on the fixer and perpare the fixer working solution. |
| Pour the fixer into the developing tank and do the same as the developing process, for every minute of soaking, shake the tank for 10sec and dislodge the bubbles by hitting on the surface of the table lightly. |
 | You
can recycle the fixer solution too. I personally recycle the fixer for
up to 4 to 5 times or up to 2 months when stored in a cool dry place. I am not suggesting you to be as frugal as me, but if you shoot a lot of film, this is one way that can help to bring cost down. |
  | Store the developer in a container and REMEMBER to label it. Keep the solution in a cool place away from pets and children. Do NOT mix with drinks or your favourite alcohol beverage. |
 | Step 5 - Final Rinse From this stage, you can open up the developing tank and expose the negatives to light. Rinse the negatives in running water. Some of the negatives (Kodak Tri-X & T-Max) have a purple tint on the surface and is only washed off with lots of water rinsing and soaking (in clean tap water). Rinse & Soak the negatives in clean tap water for at least 15min to rid of any developer or fixer residue. To save environment, recycle that water to flush or wash the toilet. |
 | Rinse very very well. |
 | Step 6 - (Final Step) Drying Now, this is the second most crucial part (after loading)... Drying. Shake off excess water from the reel. Shake hard so that you get as much excess water off the negatives as possible. I do not suggest to wipe or use any tools to dry the negatives, as direct contact to the negatives will most probably scratch the surface. Even using fingers running through the negatives will scratch the surface with the dead skin bits on the fingers. I would suggest the best possible method is shake off excess water & hang dry the negatives naturally. Always dry the negatives in a cool and dry room, preferably in an air-con room. Do not blow the negatives with hair dryer and fan as they will surely leave lots of dust particle mark on your negatives. |
 | Dry in a cool area for about 1~2 hours. Only when the negatives are totally dry, then you can cut them up to store or scan them. Storing a partially dried negatives will cause the negatives to stick onto surfaces and damage the negatives. |
 | Hang some weight at the bottom of the negative to straighten the negatives while drying. This ensure the negatives are dry evenly. |
 | Nothing beats the excitement of seeing the images crystalising in front of you... You may scan or print the negatives in dark room when the negatives are fully dried. |
processing film

1) Get a reel, canister, lid and funnel and head into the darkroom to load your film onto the reel
2) Fill your canister with the developer (brown jug) for the desired amount of time (agitating for the first minute and 10 seconds every additional minute).
3) Pour the developer out INTO THE SINK.
4) Rinse with water from the purified hose for 1 minute (fill 5 times).
5) Fill with Fix (Large white bucket with spout) and agitate for the entire 6-7 minutes while fixing.
6) Pour the Fix BACK INTO THE FIX BUCKET.
7) Rinse canister with water again.
8) Open canister and put film into wash tube for 5 – 10 minutes.
9) Wash out your canister and return to blue bins. Do not leave your canister/reel in the sink!
10) Run film through PhotoFlo and hang to dry with a clip on the top and bottom.
11) Cut into strips and place into a clearfile and place it in your 3 ring binder.

Pull the film tab out of the canister to 3 inches.
Open the back of camera by pressing the release usually located on the right side of camera or by pulling up on the rewind knob.
Place the film canister in the space on the left side of the inside of the camera, flat side up.

Pull the film across the length of the camera to the spool on the right side.

Insert the film tab into the
spool and wind it manually counter-clockwise until the film wraps around
the spool. (On an automatic camera, you usually just close the back and
press a button.)
Close the camera back and advance the film until the frame counter on the top of the camera reads 1. The rewind knob should be turning if the film is loaded correctly.
Tuesday, February 14, 2012
Camera Drawing

• Aperture
o Where/How to adjust
o List the F-stops on your camera (1.8, 2.0, 4, 5.6, etc)
• Shutter Speeds
o How to adjust
o List the speeds on your camera (1000,500,250 etc)
• Film Speed (ISO or ASA) and set it to 400 - it will live at 400 all year.
• Rewind (and rewind release, often a button on the bottom or on the front labeled with "R")
• Shutter release - button to take pics
• Lens
• How to open the back of your camera
• Viewfinder - what you look through
• Light Meter (and how does it adjust)
• Film advance - to move to the next frame, some are automatic
• Power (on/off and manual mode if your camera has options)
Tuesday
Today you have 2 assignments:
- Make a photogram (see details below)
- Draw a detailed picture of your camera labeling the items in the above post and noting how it works!
Monday, February 13, 2012
darkroom
In the darkroom you will be printing photograms this week. To print a photogram you will need to expose your subject/object for 5 to 10 seconds. You will the need to go through a chemical process to get the images to appear:
- expose
- develope
- stop
- fix
- wash
- dry
- enjoy!
Photogram


Tuesday we will be making photograms. A photogram is a photographic image made without a camera by placing objects directly onto the surface of a photo-sensitive material such as photographic paper and then exposing it to light. The result is a negative shadow image varying in tone, depending on the transparency of the objects used. Areas of the paper that have received no light appear white; those exposed through transparent or semi-transparent objects appear grey.
BRING OBJECTS TO CLASS FOR YOUR PHOTOGRAM. PLAN TO TELL A STORY, OR TO CREATE SOME INTERESTING PATTERNS, OR A NEAT DESIGN. no pocket photograms, come to class with intentional objects, not your keys and loose change!

Thursday, February 9, 2012
Bring a 35mm FILM camera Monday
- Don't forget that Monday 2-14 you need to bring your camera to class with you.
- The academic plan and out of class permission form is also due.
- Your $30 materials fee is due two weeks later on the 28th of Feb.

Wednesday, February 8, 2012
To import digital images
- Open IMAGE CAPTURE FROM YOUR APPLICATIONS FOLDER
- Plug in your camera and turn it on


- Select DOWNLOAD SOME.
- Choose a new folder to download into EVERY time you download.

- Next select the pictures you want to download and save them to your NEW folder.
- and you are DONE!

Perspective
Today you are going to have a majority of the period to shoot pictures in Hamlin Park and/or around campus (not in the halls/classes!). Our goal is to use the basics we have learned about how the camera works and also to take interesting and unique images.
- what to shoot: you will be shooting 3 images of 5 different subjects/objects. Each subject should be shot from a unique angle and all should follow the rule of thirds (see below)
- what to do with your images: you will be importing your images and then creating a contact sheet in Bridge Monday.
- Things to remember:
- The rule of thirds: an image can be divided into nine equal parts by two equally-spaced horizontal lines and two equally-spaced vertical lines. The four points formed by the intersections of these lines can be used to align features in the image. aligning a photograph with these points creates more tension, energy and interest in the photo than simply centering the feature would.
 This photograph of a sunset taken in theThousand Islands region demonstrates the principles of the rule of thirds
 - Shooting from unique angles: none of your 15+ images should be taken from 5'8" - 6'2". That is, squat down, stand on top of something, crouch behind something, move around to find a different and unique perspective at your subject. Anyone can stand there and take a snap shot, show usyour perspective by thinking outside of that box.
- Each of your 3 images of any given object/subject should be taken with a different aperture and/or shutter setting (yet all properly exposed!)

Monday, February 6, 2012
Welcome
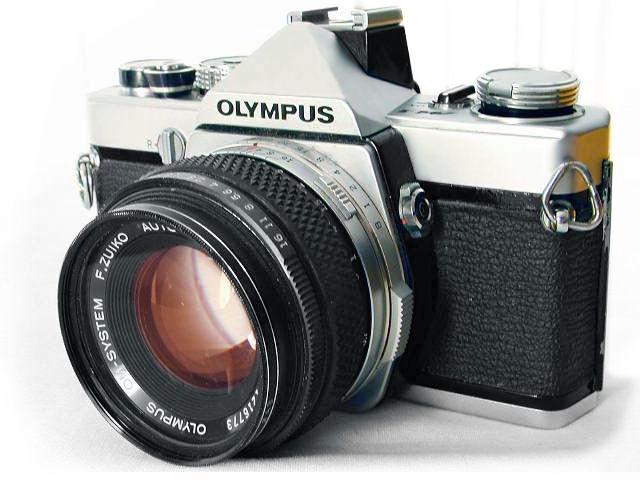
This is the site we will use for project and assignment details throughout the semester. For this class you are going to use film, photo paper, and a 35mm SLR camera (more info on that to come).
Friday, February 3, 2012
WELCOME!
Welcome to Photography! FILM Photography! This semester you will spend a lot of time getting to know how cameras work, how to take great pictures, and how to develop your film into amazing images!


Subscribe to:
Posts (Atom)