Monday, November 22, 2010

examples:


Make your own light box for $.50

Photo lighting made easy.

Not having enough light seems to be the #1 annoyance to most people when they’re trying to take nice photos of their items. And #2 is what to do with that light if you do have it!
We can’t post photos here, so I’ll have to keep linking to flickr, but here goes…

I guess lightboxes are cool. I dunno, I’ve never used one. I’ve sold lots of stuff on ebay and craigslist, and have a few things still listed in my vintage shop, and piece of cardboard and light bulb have always served me just fine.
Here’s what I call my 50 cent lightbox:


Yup, a sheet of Bristol board taped to the floor and wall. And today was a perfect day to demonstrate; cold, cloudy, blustery, and quite dark. What you see there is what you get. Not very good light. Big deal.

Enter the light bulb, or to be precise, the Ott bulb. These are cheap, easily available at hardware stores, and the best lighting invention since sliced bread. Even better in fact, since sliced bread has very little to do with photography.
Take one table lamp, remove shade, screw in Ott bulb, and put on stairs. What a difference!


Notice how the light is positioned roughly 45 degrees above the item, and about 45 degrees off to the side. If my space were bigger, I’d use a 2nd bulb on the left as well, to eliminate the shadows cast by this one. Oh well, I’ll just have to make it work. You can move the light around so that you don’t cast shadows where you don’t want them.

Now, stop here and take a good look. Those walls should be lighter. What’s going on? The camera wants to make everything a neutral tone, so if there’s a lot of light stuff in the photo, like here, it will try to darken it to get it to neutral. If I had taken a shot of only the white wall, it would have been even darker, but the floor is pulling the exposure up a bit.
This camera has “Exposure Compensation” which is used to essentially fool the meter. If I set it to overexpose by 1 f-stop, here’s what I get:


Much better. Some of the upper wall on the right is starting to get blasted now, but I don’t care.

So what’s that thing on the cardboard? It’s an ugly old, busted ceramic brooch. Can we make ugly look half decent?
Here’s a shot at floor level:


Not half bad lighting. Notice how only the front part is in focus. This is because the aperture is set to its widest (lowest number f-stop), so the depth of field (portion of the photo in focus) is very shallow. If I set the f-stop to the maximum (smallest aperture), it pulls much more into focus:


Maybe a bit too much detail for this ugly, dirty, broken thing. Buyer beware!

How about something much prettier? Here’s an AUTO shot of our next beauty contestant:


I’ve moved the light closer to the front because I like the illuminating better. Once again, everything is a bit too dark, but we know how to fix that. Here’s a closer shot:


Even darker! Why? Because there’s much more white in the picture, so once again, the camera is trying to pull that white towards neutral grey. So, we crank up the exposure compensation again, just like before, and we zoom in a bit:


The shallow depth of field is much more evident on this larger subject. The little diamond on the front ring of the lens is in sharp focus, but the rest fades into a blur. So once again, we set the aperture for a much higher number:


Now that’s a camera!
And two more examples using a macro:


All this with a sheet of cardboard and one light bulb on a miserable, dark day.
You don’t have to live in sunny California to take well lit photos, you just have to live close enough to a hardware store. And yes, all the item photos were taken on a tripod or with the camera on the floor. There’s absolutely no other way.

Wednesday, November 17, 2010

more examples


Double Exposures


For your portrait assignment you are going to be required to print one of your images as a double exposure. The other can be printed as normal or an additional double image. Your options for double exposure are creative dodging and burning or sandwiching negatives.

Wednesday, November 10, 2010

Studio Lighting!!!


Short Lighting

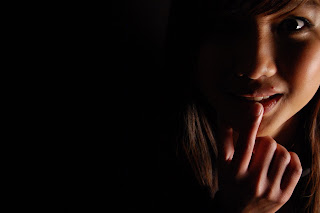
Short lighting illuminates the part of the face that is not facing directly at the camera. In Figure Z, we can see that the side of the face facing the camera is in the shadow side. Short lighting often is the preferred light positioning for most portraits especially for rounder faces or faces less defined facial features.

20090803-IMG_9103

Putting the shadow side of the face closer to the camera narrows down the face and works well for majority of subjects except those with long or thin faces.

Broad Lighting

Broad lighting is the opposite of short lighting where the lit portion of the face faces the front of the camera. Showing the lit portion of the face directly at the camera broadens the face as it illuminates majority of the subject’s face instead of hiding it in the shadows.

20090803-IMG_9108

While not as popular as short lighting, broad lighting can be used effectively with thinner faces and can make subjects such as the elderly look more radiant and lively. Broad lighting is a “cheerful” light position that portrays openness and excitement.


Read more: http://www.howitookit.com/classic-lighting-styles.html#ixzz14njY6ZBR

more on lighting

Broad Lighting

Here I want to say not a particular light pattern, but somewhat a combination of light patterns with subject's and main light's orientation to the camera. As you noticed, all light patterns were shown for a full face view. When you turn the subject's face to 3/4 view you have two choices to place the main light, which will create different effects. Broad lighting will create an effect of a broad face, because the wider [visible] part of the face, neck and shoulders will be lit and as such more prominent in the photograph. This approach is flattering mostly for slim and thin people, don't use it with heavy people, it will produce the opposite effect.
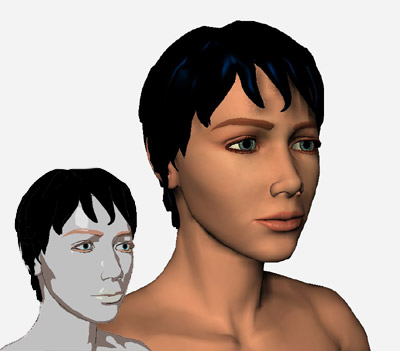
Broad lighting
Broad lighting

To achieve this effect you have to place the main light to the opposite side from the direction of the subject's face. So if the subject looks to your left (to the camera's left) - as shown below - you place the main light to your (camera's) right or very close to the camera.
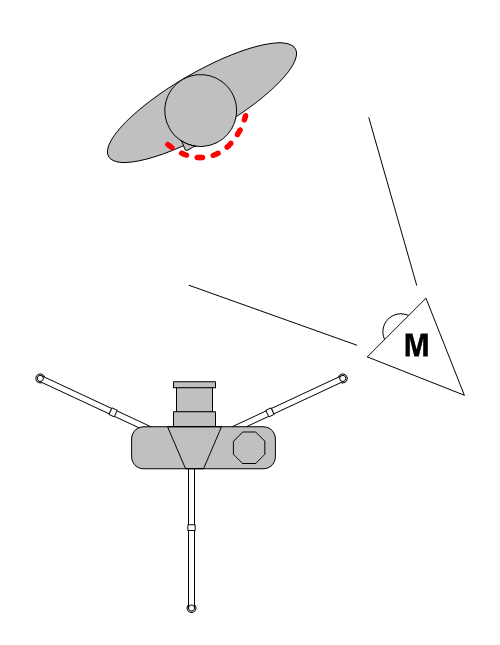
Broad lighting setup
Broad lighting studio setup
~ Top ~

Short Lighting

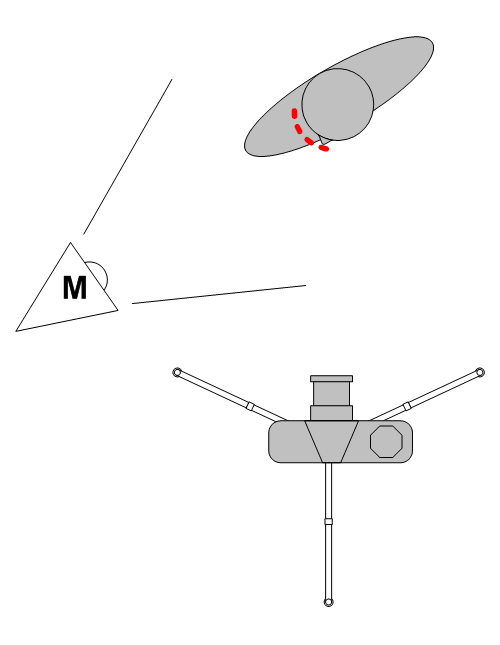
This approach is opposite to the broad lighting and achieves opposite results, it reduces the visible part of the subject's face, neck and shoulders that are lit by the main light. As the result, the heavy people with such approach seem thinner, which creates a flattering effect.
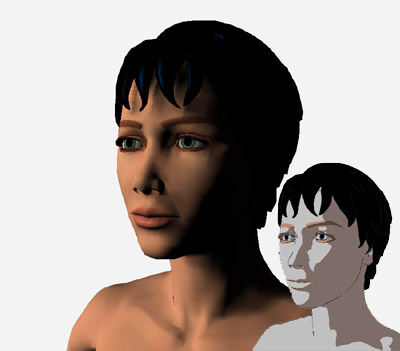
Short lighting
Short lighting

The diagram below shows the main light placement in relation to the camera and the subject. In contrary to the broad lighting the main light is placed in front of the subject's face (butterfly light pattern is often used with this approach. [end of the text]

Shot lighting setup

Short and Broad lighting

What Is Short Light?

Short light is type of studio lighting setup, where the face side which is further from the camera gets the main light. see the diagram for details. In this type of lighting setup, the side of the face which is toward the camera gets less light then the side facing away form the camera. The effect you get when using this lighting setup is a thin face, this is why it is good to photograph fat (or chubby) people with a short light setup.

short light setup

Diagram 1 - Short Light


Let's look at a picture of a friend of mine - Winnie the poo. Looks like Winnie had allot of honey and he is quite chubby. The flash is set up to my right, and Winnie is looking to his left. This make his face look a bit thinner than what they really are. Short light is very useful in portrait photography, as it gives drama to the subject. (Short light setup also stresses skin wrinkles, to create even more drama for older people)

short light

What Is Broad Light?

Broad light is just the opposite of Short light. In the Broad Light setup, THe side that is getting the most light is the side turning towards the camera. This setup is less commonly used for portraits as it tends to make people look chubby. See the diagram for setup.

broad light setup

Diagram 2 - Broad Light


Lets look at Winnie again. This picture was taken at the same focal length (135mm with 1.5 crop factor D70's sensor). This time Winnie looks very chubby. Oh Winnie! what have you been eating? Also note how the picture looks a bit flatter. There are not allot of light and shade plays.

broad light

For both types of light you can use a fill light at the opposite side to the main light, or do as I did and use a reflector at 45 deg. (see diagrams).

Conclusion:

Light Type

Side to Get Most Light

Chubbiness

Wrinkles

Short Light

Away From Camera

Reduce

Intensify

Broad Light

Facing Camera

Increase

Reduce


Studio Lighting Portraits...


Studio Lighting!!!
Your task this period is to shoot some interesting , creative and unique portraits using the studio lights. Remember the different lighting techniques demonstrated in class. Use the lights to add emotion, feeling, or interesting shadows to your images. Try to think out of the box, manipulate the image
with Manual settings on the camera, blur motion, stop action, take tons of pics, and have FUN! Shoot for the period in groups of 4 to 6 per light station. Everyone should shoot their own photo session. Take turns as each others subjects. Shoot a minimum of 12 pictures per photographer from 2 locations. .


Monday, November 8, 2010

Portriats

YOUR ASSIGNMENT:

You will be shooting one roll of portrait pictures. This roll can contain no more than 2 different subjects. The goal is for you to have organized portrait sessions with your subjects in varied locations, costumes, makeup, props, etc. Your portraits should NOT be snapshots or candids. Consider the 20 techniques we read last week, try and incorporate the ones you found most useful. Consider portraits you find interesting, try and shoot something similar! Be creative, be the boss of your subject, and have fun!!!