


more on lighting
Broad Lighting
Here I want to say not a particular light pattern, but somewhat a combination of light patterns with subject's and main light's orientation to the camera. As you noticed, all light patterns were shown for a full face view. When you turn the subject's face to 3/4 view you have two choices to place the main light, which will create different effects. Broad lighting will create an effect of a broad face, because the wider [visible] part of the face, neck and shoulders will be lit and as such more prominent in the photograph. This approach is flattering mostly for slim and thin people, don't use it with heavy people, it will produce the opposite effect.
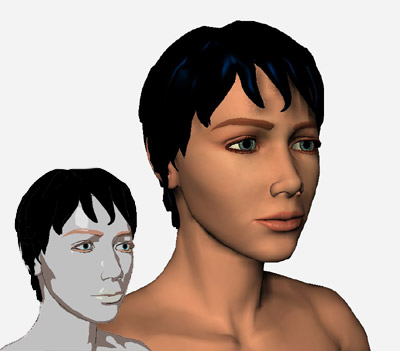
To achieve this effect you have to place the main light to the opposite side from the direction of the subject's face. So if the subject looks to your left (to the camera's left) - as shown below - you place the main light to your (camera's) right or very close to the camera.
Short Lighting
This approach is opposite to the broad lighting and achieves opposite results, it reduces the visible part of the subject's face, neck and shoulders that are lit by the main light. As the result, the heavy people with such approach seem thinner, which creates a flattering effect.
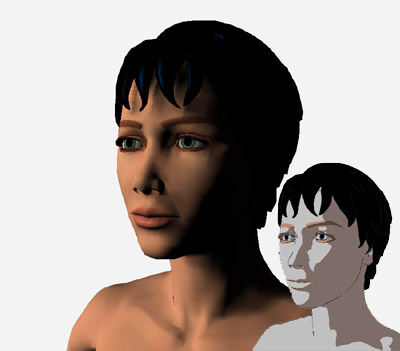
The diagram below shows the main light placement in relation to the camera and the subject. In contrary to the broad lighting the main light is placed in front of the subject's face (butterfly light pattern is often used with this approach. ![[end of the text]](http://www.romanzolin.com/img/misc/text_end.png "End of the article")
Short and Broad lighting
Short light is type of studio lighting setup, where the face side which is further from the camera gets the main light. see the diagram for details. In this type of lighting setup, the side of the face which is toward the camera gets less light then the side facing away form the camera. The effect you get when using this lighting setup is a thin face, this is why it is good to photograph fat (or chubby) people with a short light setup.

Diagram 1 - Short Light
Let's look at a picture of a friend of mine - Winnie the poo. Looks like Winnie had allot of honey and he is quite chubby. The flash is set up to my right, and Winnie is looking to his left. This make his face look a bit thinner than what they really are. Short light is very useful in portrait photography, as it gives drama to the subject. (Short light setup also stresses skin wrinkles, to create even more drama for older people)

What Is Broad Light?
Broad light is just the opposite of Short light. In the Broad Light setup, THe side that is getting the most light is the side turning towards the camera. This setup is less commonly used for portraits as it tends to make people look chubby. See the diagram for setup.

Diagram 2 - Broad Light
Lets look at Winnie again. This picture was taken at the same focal length (135mm with 1.5 crop factor D70's sensor). This time Winnie looks very chubby. Oh Winnie! what have you been eating? Also note how the picture looks a bit flatter. There are not allot of light and shade plays.

For both types of light you can use a fill light at the opposite side to the main light, or do as I did and use a reflector at 45 deg. (see diagrams).
Conclusion:
| Light Type | Side to Get Most Light | Chubbiness | Wrinkles |
| Short Light | Away From Camera | Reduce | Intensify |
| Broad Light | Facing Camera | Increase | Reduce |
Studio Lighting Portraits...


Studio Lighting!!!
Your task this period is to shoot some interesting , creative and unique portraits using the studio lights. Remember the different lighting techniques demonstrated in class. Use the lights to add emotion, feeling, or interesting shadows to your images. Try to think out of the box, manipulate the image with Manual settings on the camera, blur motion, stop action, take tons of pics, and ha
 ve FUN! Shoot for the period in groups of 4 to 6 per light station. Everyone should shoot their own photo session. Take turns as each others subjects. Shoot a minimum of 12 pictures per photographer from 2 locations. .

No comments:
Post a Comment